

Learning how to use hearing aid cleaning tools helps keep your devices clear of wax, dust, and moisture so they work properly every day. Most kits include a soft brush, a wax pick or wire loop, a vent cleaner, and a magnetic battery wand. By using these small tools gently each evening, you can keep your sound clear and help your devices last longer.
Daily maintenance only takes a couple of minutes once you get used to the routine, much like learning proper hygiene tool bidet vs douche uses. Sitting down at a well-lit table makes the process comfortable and steady for older adults. Having a soft towel spread across your work surface keeps small parts from rolling away or getting damaged if you drop them.

How to Use Hearing Aid Cleaning Tools Step by Step
- Inspect your device under bright light: Look closely at the microphone openings, the sound port, and the dome or earmold to spot built-up earwax or debris before you begin.
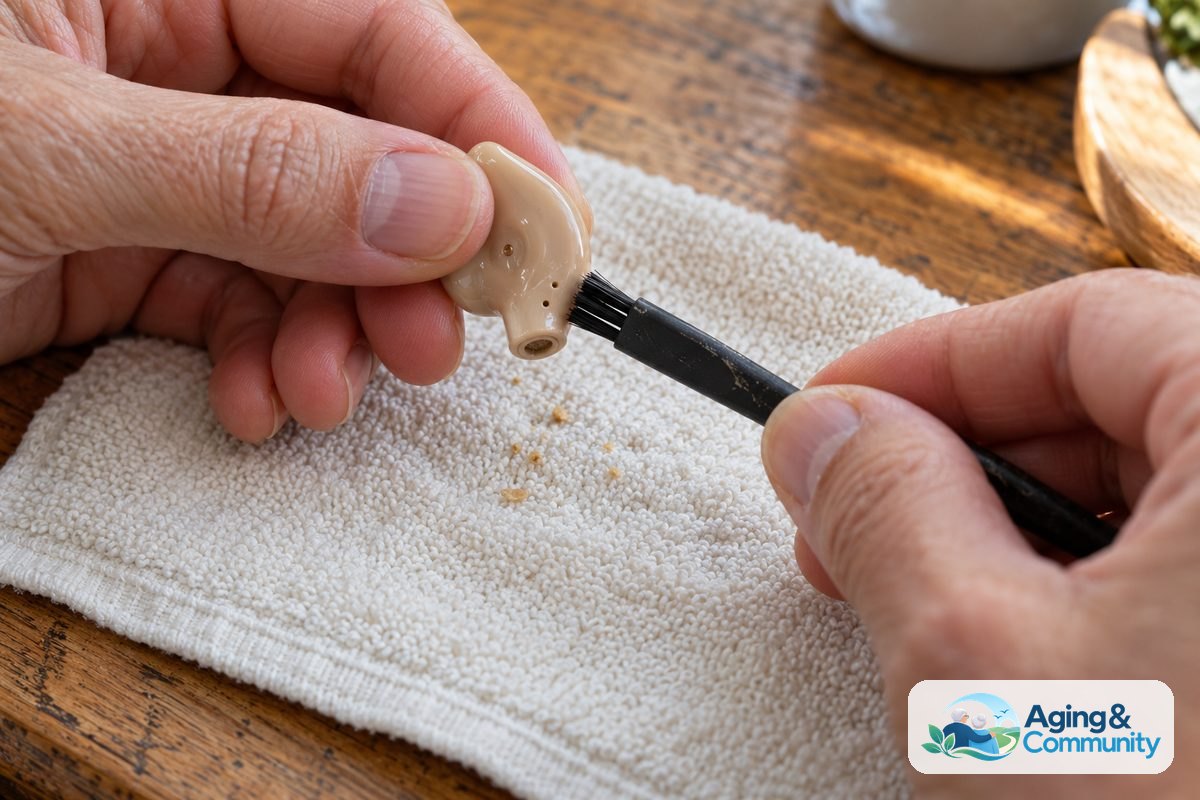
- Gently brush the exterior surfaces: Hold the hearing aid upside down so loosened wax falls down onto the table, and use the soft-bristled brush across the shell, buttons, and microphone ports.
- Clear wax from the sound opening: Use the small wax pick or wire loop to carefully scoop dry wax away from the receiver tip without poking deeply inside the opening.
- Clean out the ventilation tube: Slide the long, flexible vent cleaner rod all the way through the vent canal from one side to the other, then wipe the end clean with a dry tissue.
- Wipe the entire body with a dry cloth: Finish by rubbing down the outer casing and dome with a soft, lint-free cloth to remove skin oils before storing the device for the night.
Taking these steps nightly ensures that sticky residue does not dry hard inside the small openings. Pairing your routine with moisture management can also help. Many people learn how to use hearing aid drying capsules to draw out internal sweat overnight while their clean devices rest inside a storage case.
Common Mistakes to Avoid
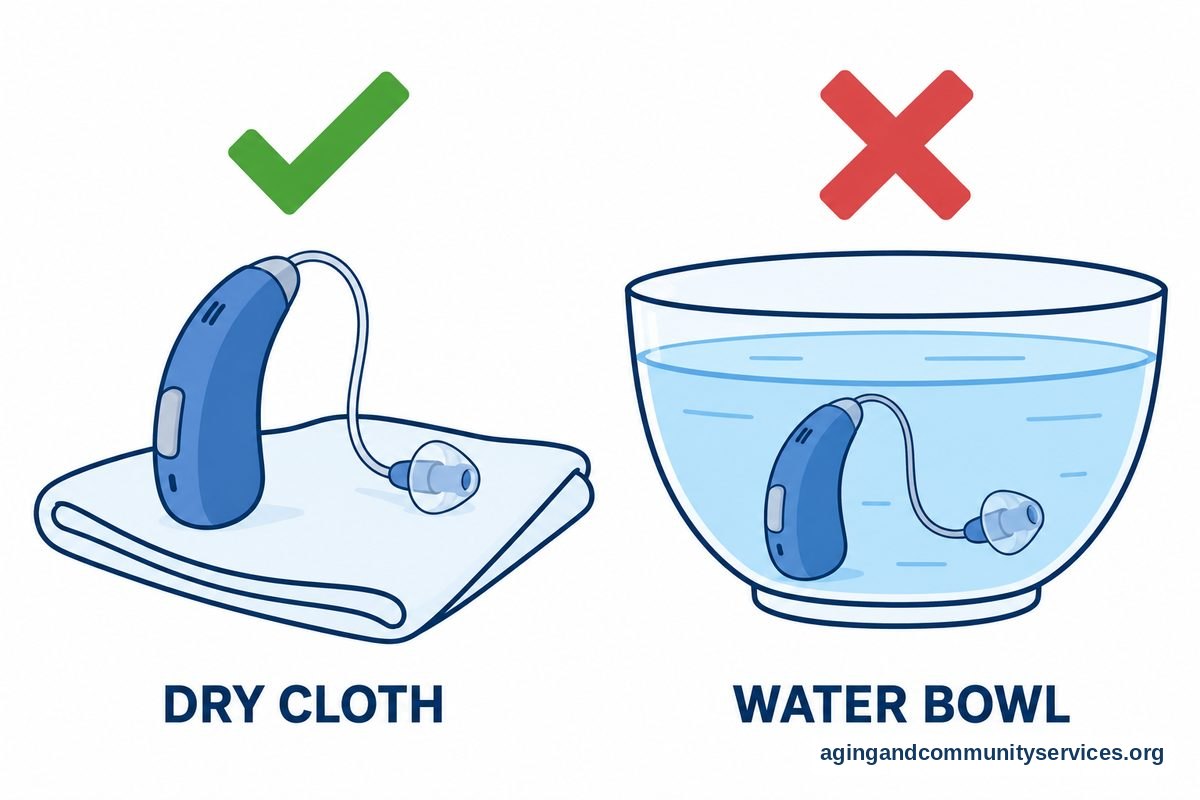
- Using water or liquid cleaners: Never submerge hearing aids or use rubbing alcohol, household cleaners, or wet wipes, because liquid can quickly ruin delicate internal microphones and receivers.
- Poking tools too deep into openings: Pushing a wire pick far into the sound port can puncture the delicate receiver membrane or shove wax deeper into the mechanics.
- Cleaning right over a hard, bare counter: Working above a hard tile floor or bare counter creates a high drop risk that can crack the shell or dislodge internal wiring.
- Brushing with the openings facing upward: If you brush while holding the hearing aid right-side up, loose flakes of wax fall directly back into the sound ports.
- Forgetting to clean the cleaning tools: Wax left on your brushes and picks can transfer back to your hearing aid the next day, so wipe your tools with a dry tissue after every use.
Setting up a comfortable space makes regular care much easier. Safe home setups are a big part of staying independent, and the National Institute on Aging offers helpful advice on aging in place so daily routines stay simple and stress-free.
When to Call for Help or Professional Advice
Even with steady home care, there are times when cleaning tools cannot solve a sound problem. If you notice persistent whistling, weak volume, or distorted sound after a thorough cleaning, reach out to your audiologist or hearing aid specialist. You should also call them if wax gets packed tightly behind the wax guard where your pick cannot reach, or if the plastic earmold develops cracks.
When you contact your hearing care provider, tell them exactly what you are experiencing. You can explain that you brushed the shell, scooped the wax port, and cleared the vent, but the device still sounds dull or silent. They have special vacuum tools and ultrasonic baths that can deep clean components without causing harm.
If cost or coverage makes you hesitate to visit a clinic for maintenance or replacements, look into local resources. Many people wonder does medicare cover hearing aid services and appointments, and local aging agencies can help you review your benefits. You can connect with support through the Eldercare Locator to find community services that assist with healthy hearing access.
Understanding Each Tool in Your Hearing Aid Kit
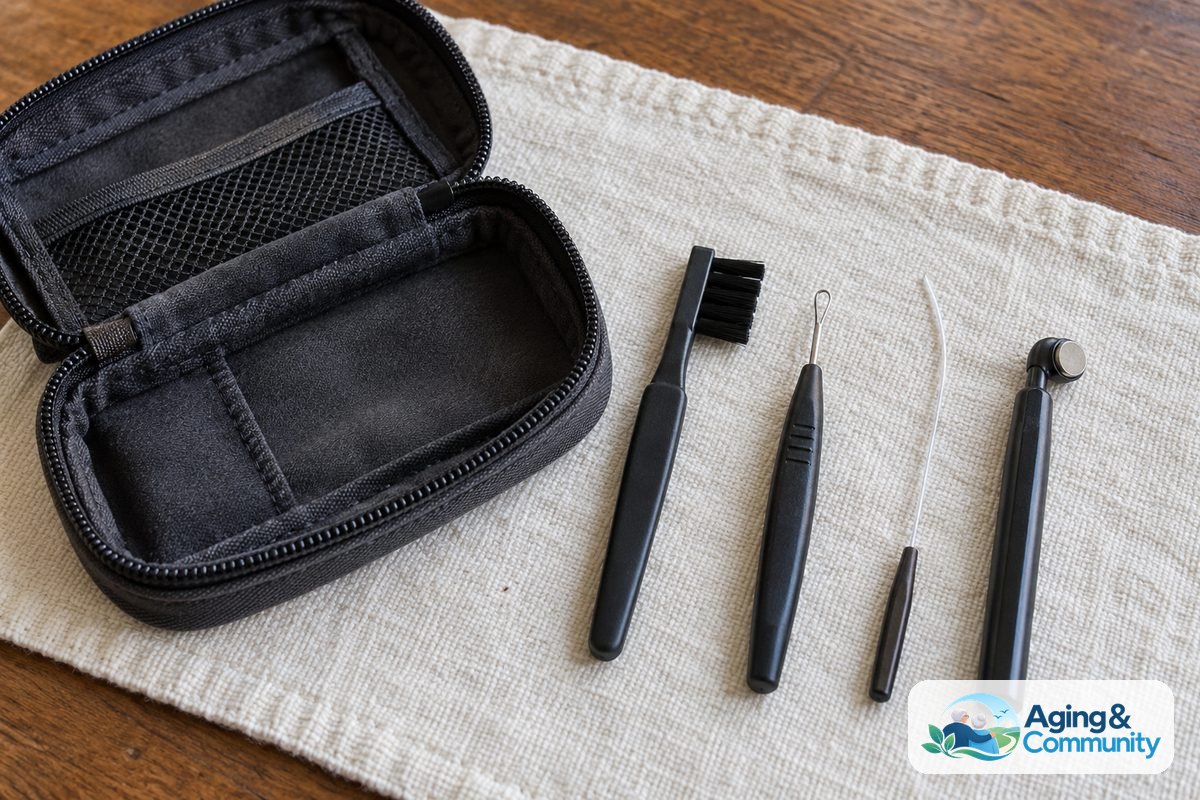
A standard cleaning set usually comes inside a small zippered pouch or plastic case. Each tool has a specific job designed to protect sensitive electronics while removing wax.
The soft-bristled brush is your primary tool. It cleans large surfaces and sweeps away flaky wax from microphone screens. Many brushes have a built-in magnetic tip on the opposite end, which helps you pick up tiny zinc-air batteries without fumbling.
The wire loop or wax pick handles stubborn, sticky buildup. Unlike a straight pin or toothpick, the wire loop has rounded edges that scoop wax outwards rather than pushing it down. The long, thin vent cleaner looks like a flexible plastic thread. It is made specifically to push through the small hole that lets air pass through your ear canal.
Finally, your kit might include a multi-tool that combines several of these items into a single pen-like body. These compact tools are great for travel or keeping in a purse for midday touchups.
Replacing Wax Guards and Rubber Domes
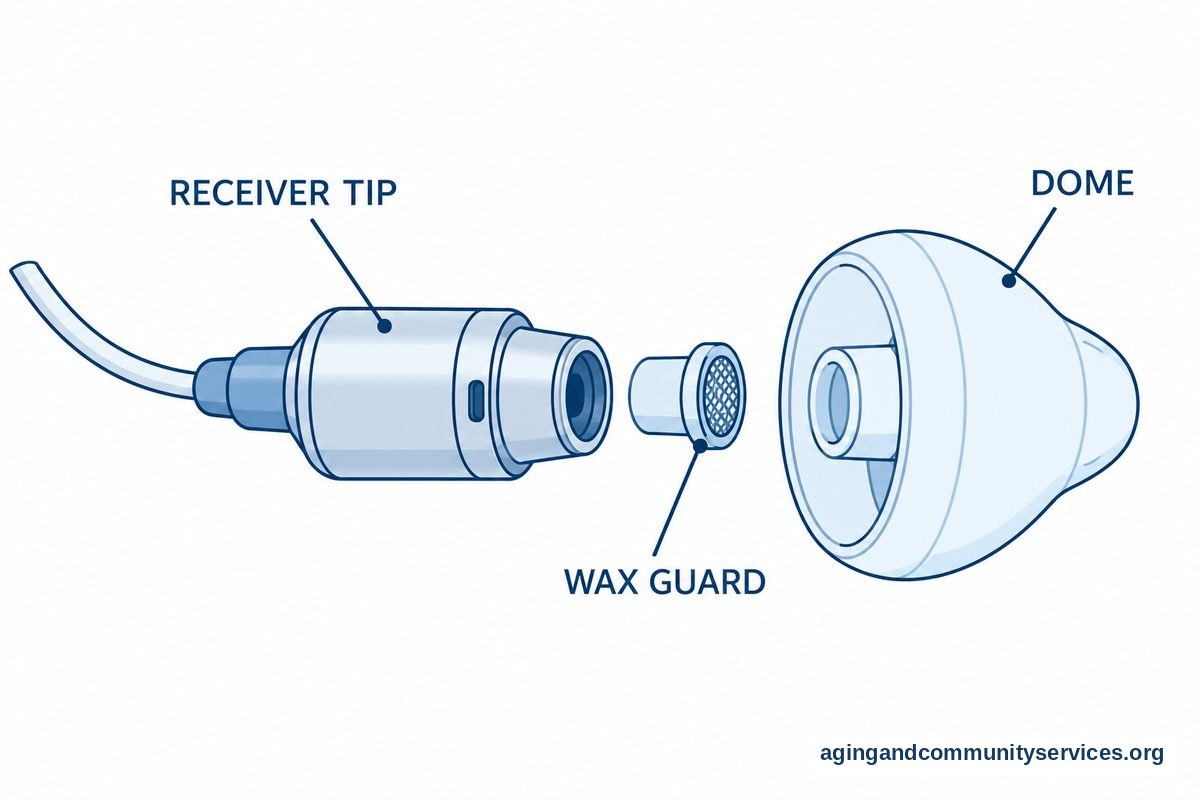
Besides using your brush and pick, regular care often involves changing the disposable parts on receiver-in-canal devices. The wax guard is a tiny plastic basket sitting right at the sound tip. When wax blocks this tiny filter, sound cannot pass through, making the hearing aid seem dead.
To change a wax guard, use the disposable tool provided in your refill pack. One side of the stick has an empty pin that pulls out the old filter, while the other side holds the new filter ready to press into place. Changing this guard once a month or whenever it looks clogged keeps sound clear.
Rubber domes slip over the sound tip to hold it comfortably in your ear canal. Wipe these domes clean each night with your dry cloth. If a dome becomes brittle, discolored, or torn, peel it off and press a fresh one securely onto the canal tip. If you are researching devices that are simple to handle and maintain, exploring options for a hearing aid for elderly users can help you find styles with easy-to-change parts.
Frequently Asked Questions
How often should I use my hearing aid cleaning tools?
It is best to use your brush and cloth every evening before you go to bed. This routine allows any earwax loosened during the day to be swept away easily while it is dry. Use the wire pick and vent cleaner a few times a week, or whenever you spot visible buildup.
Can I wash my hearing aid tools with soap and water?
You can wash the plastic handles and separate brush tools with warm soapy water, but you must let them air dry completely before touching your hearing aid. Never wash tools while they are touching the device, and never use wet tools on the electronics.
What should I do if a tool gets stuck in the vent?
If a vent cleaner rod feels tight or gets stuck, do not yank it hard. Gently twist the handle while easing it back in the direction it entered. If it will not budge, leave it in place and bring the device to your hearing care provider so they can remove it safely.
Can I use safety pins or paperclips instead of proper tools?
No, you should never use household pins, paperclips, needles, or toothpicks on your hearing aids. Metal sewing pins can puncture internal receivers, and wooden toothpicks can splinter and leave pieces trapped inside the sound canal.
Why does my hearing aid still sound muffled after cleaning?
If your device sounds muffled after you clean the outer shell and vent, the wax guard inside the sound tip may be clogged. Try replacing the wax guard with a new one. If the sound remains faint, the device may require a professional vacuuming or an internal repair by an audiologist.